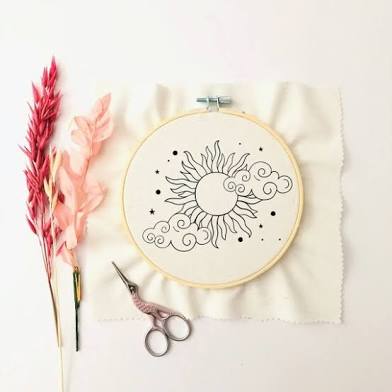
Iron-on transfers can be a game-changer. They offer a quick and easy way to transfer intricate patterns onto fabric—no lightboxes, no tracing paper, just press, peel, and stitch. In this guide, I’ll walk you through everything you need to know to make the most of iron-on transfers for hand embroidery.
Get The Suplie List By Clicking Here
What Are Iron-On Transfers?
Iron-on transfers are pre-printed designs that you can apply to fabric using heat from an iron. Once transferred, the lines act as a stitching guide, making them perfect for beginners and seasoned stitchers alike. They’re available as reusable transfer sheets, single-use designs, or printable sheets for custom work.
---
Benefits of Using Iron-On Transfers
Time-saving: Skip the time-consuming tracing process.
Consistent designs: Great for replicating patterns over multiple projects.
Beginner-friendly: Clear guidelines make it easier to follow stitching paths.
Reusable options: Some transfers can be used multiple times with consistent results.
---
Materials You’ll Need
Iron-on transfer (store-bought or custom-printed)
Fabric (cotton and linen work best)
Iron (no steam)
Hard surface (like an ironing board or table with a pressing mat)
Embroidery hoop and floss
Get The Suplie List By Clicking Here
---
How to Use Iron-On Transfers
Step 1: Prepare Your Fabric
Wash and iron your fabric to remove wrinkles and any sizing that may prevent the transfer from sticking properly. Use natural fibers because synthetic fabrics may not hold the transfer ink as well. Try your transfer on a test swatch to get a feel for timing and temperature.
Step 2: Position the Transfer
Place the transfer face-down on your fabric where you want the design. Double-check the orientation—there’s no undo button!
Step 3: Apply Heat
With your iron set to medium-high (no steam), press down firmly for 10 seconds. Avoid sliding the iron around to prevent smudging.
Step 4: Check and Repeat if Needed
Carefully lift a corner to check if the design transferred fully. If not, re-press with the iron.
---
DIY Iron-On Transfers
Want custom designs? Use iron-on transfer paper compatible with inkjet printers. Print your design in reverse (mirror image), then follow the same steps as a store-bought transfer.
---
Removing Transfer Lines
Most iron-on lines are permanent, but if you’re concerned about visibility, stitch slightly outside the lines or use darker thread colors. Alternatively, look for heat-erasable or water-soluble transfer options.
---
Iron-on transfers simplify the embroidery setup process, helping you focus more on creativity and less on prep work. With a little practice, they can become a go-to tool in your embroidery kit—ideal for gifts, heirlooms, or just a relaxing weekend project.
Get The Suplie List By Clicking Here
Mastering the Basics: How to Choose the Right Embroidery Floss and Needles
Starting an embroidery project can be exciting—until you're standing in the craft store, overwhelmed by rows of floss and endless needle options. Whether you're a beginner or looking to refine your toolkit, understanding how to choose the right embroidery floss and needles is essential for beautiful, frustration-free stitching.
Let’s break it down step by step.
---
1. Choosing the Right Embroidery Floss
Embroidery floss is the thread used to create your design. It comes in various types, textures, and materials, so selecting the right one depends on your project’s needs.
Types of Embroidery Floss:
Cotton Floss: The most commonly used. It usually comes in six strands twisted together, allowing you to separate them for finer or bolder stitching. DMC and Anchor are popular brands.
Pearl (Perle) Cotton: Has a twisted, shiny finish and cannot be separated. Great for bold, textured designs.
Silk Floss: Luxurious and smooth, perfect for high-end work or heirloom pieces.
Metallic Floss: Adds sparkle, but can be tricky to use—kinks and frays easily.
Variegated Floss: Multicolored thread that adds dimension and a hand-dyed look to your stitches.
Tips for Choosing Floss:
Match the material to the look and feel you want. For soft, vintage looks, stick with cotton. For shine, use silk or metallics.
Always buy enough floss from the same dye lot to ensure color consistency.
Use colorfast floss if the item might be washed.
---
2. Choosing the Right Embroidery Needles
The right needle can make a big difference in how smoothly you stitch.
Key Features to Consider:
Eye Size: Embroidery needles have a larger eye to accommodate multiple strands of floss.
Length and Thickness: Match to your fabric and floss. Thicker needles for heavier threads and looser weaves; thinner needles for finer threads and tight-weave fabric.
Point Type:
Sharp Needles (Embroidery/Crewel): Ideal for woven fabric.
Blunt Needles (Tapestry): Used for counted thread work like cross-stitch or when working on evenweave or canvas.
Common Needle Types:
Embroidery (Crewel) Needles: Best all-purpose option; sharp point and long eye.
Tapestry Needles: Blunt tip for evenweave fabrics.
Chenille Needles: Large eye and sharp point, suitable for wool or ribbon embroidery.
Milliners/Straw Needles: Great for making French knots and bullion stitches.
Needle Size Chart (General Guide):
Fabric Type Needle Size Floss Strands
Linen/Evenweave 24–26 (Tapestry) 1–2 strands
Aida 14-count 24 (Tapestry) 2–3 strands
Cotton/Woven 7–10 (Embroidery) 2–6 strands
---
3. Bonus Tips for Success
Use a needle threader if threading floss feels tricky—especially with metallics.
Switch needles when they dull or bend to avoid fabric damage.
Store floss in labeled bobbins or bags to avoid tangles and confusion.
Test floss on a swatch if unsure how it interacts with your fabric.
---
Final Stitch: The Right Tools Make a Difference
Like any craft, embroidery is easier and more enjoyable when you're working with the right tools. By choosing floss and needles that suit your fabric, design, and stitching style, you'll ensure your creations look just as beautiful as you imagined—and enjoy the process along the way.
Ready to start stitching? Share your favorite floss and needle pairings or ask for recommendations in the comments below.

Комментариев: 0